Student Registration
Self-Service Registration Resources
How to access Self-Service Registration
- Go to MyPortal
- Enter your W# and password
- Locate the Registration Self-Service Card and click the Open Registration Dashboard link
Welcome to the Registration Dashboard
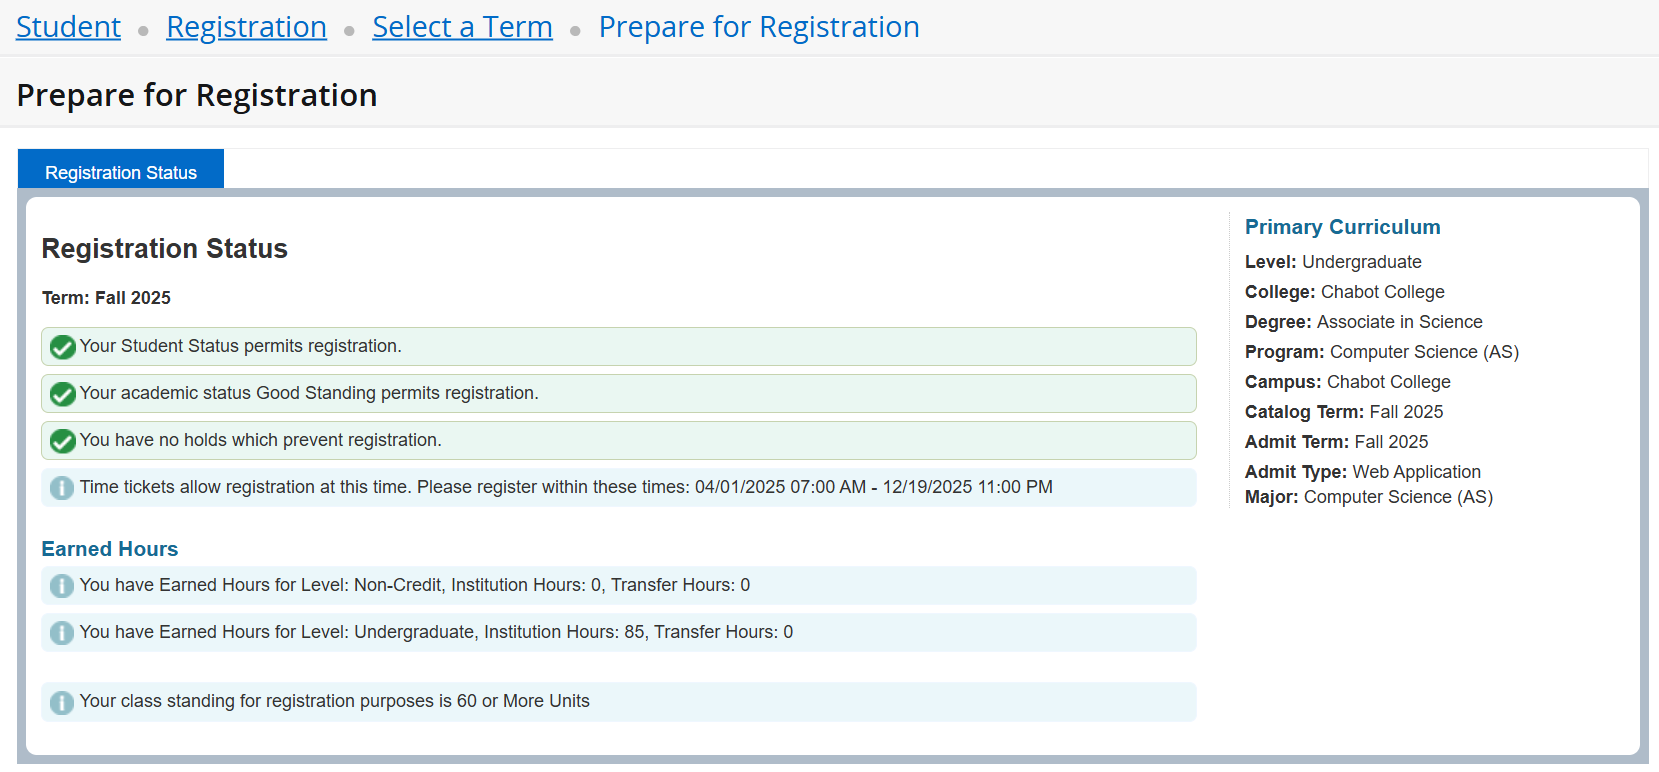
View your registration status, browse the Schedule of Classes, and register for classes
through the Registration Dashboard. See below for more information. 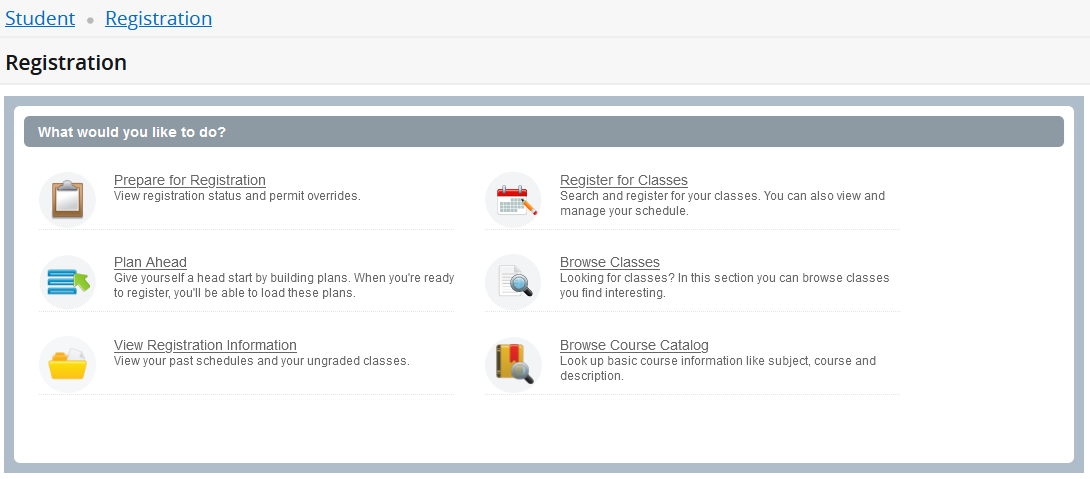
Use the View Registration Information link to view a class schedule.

Use this page to look up and print a class schedule for the current or past terms. To print, click the Printer icon in the upper right corner.

Print or save as PDF

Use the Browse Classes page to search the Schedule of Classes for available course sections.
IMPORTANT NOTE: The following examples DO NOT reflect the actual course section offerings.
- Click on Browse Classes.

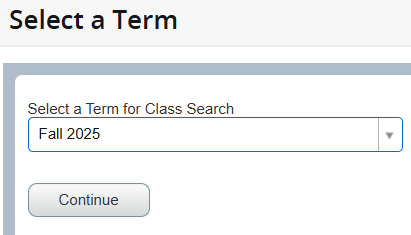
- Select a term and click Continue.
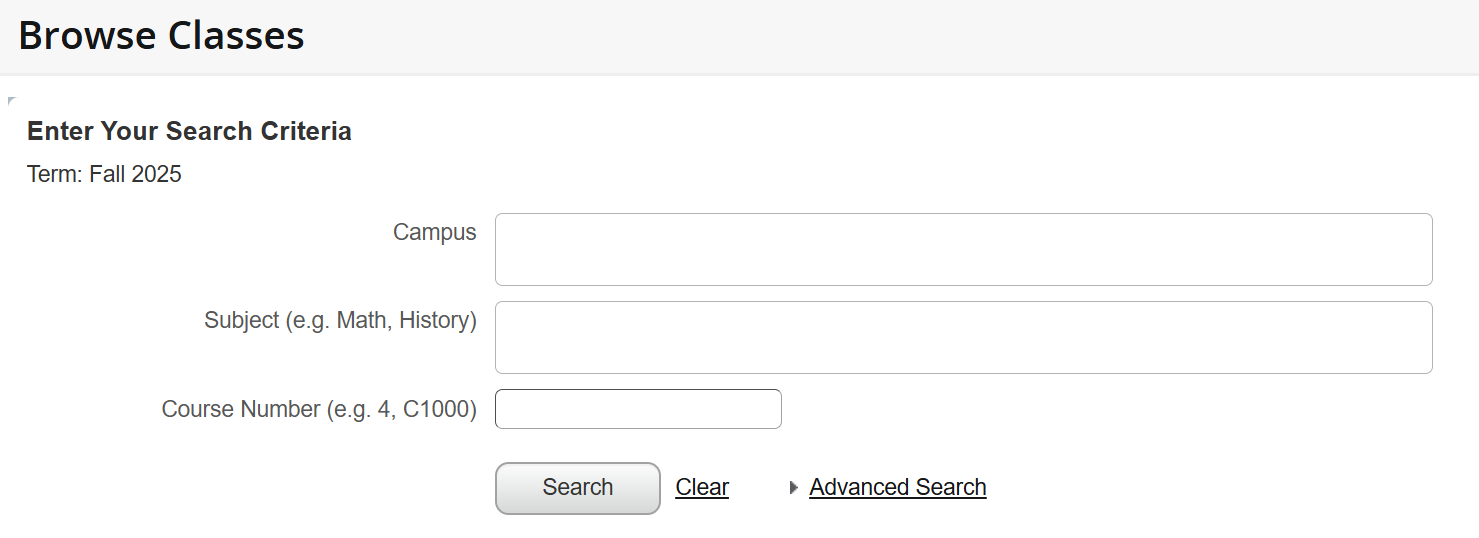
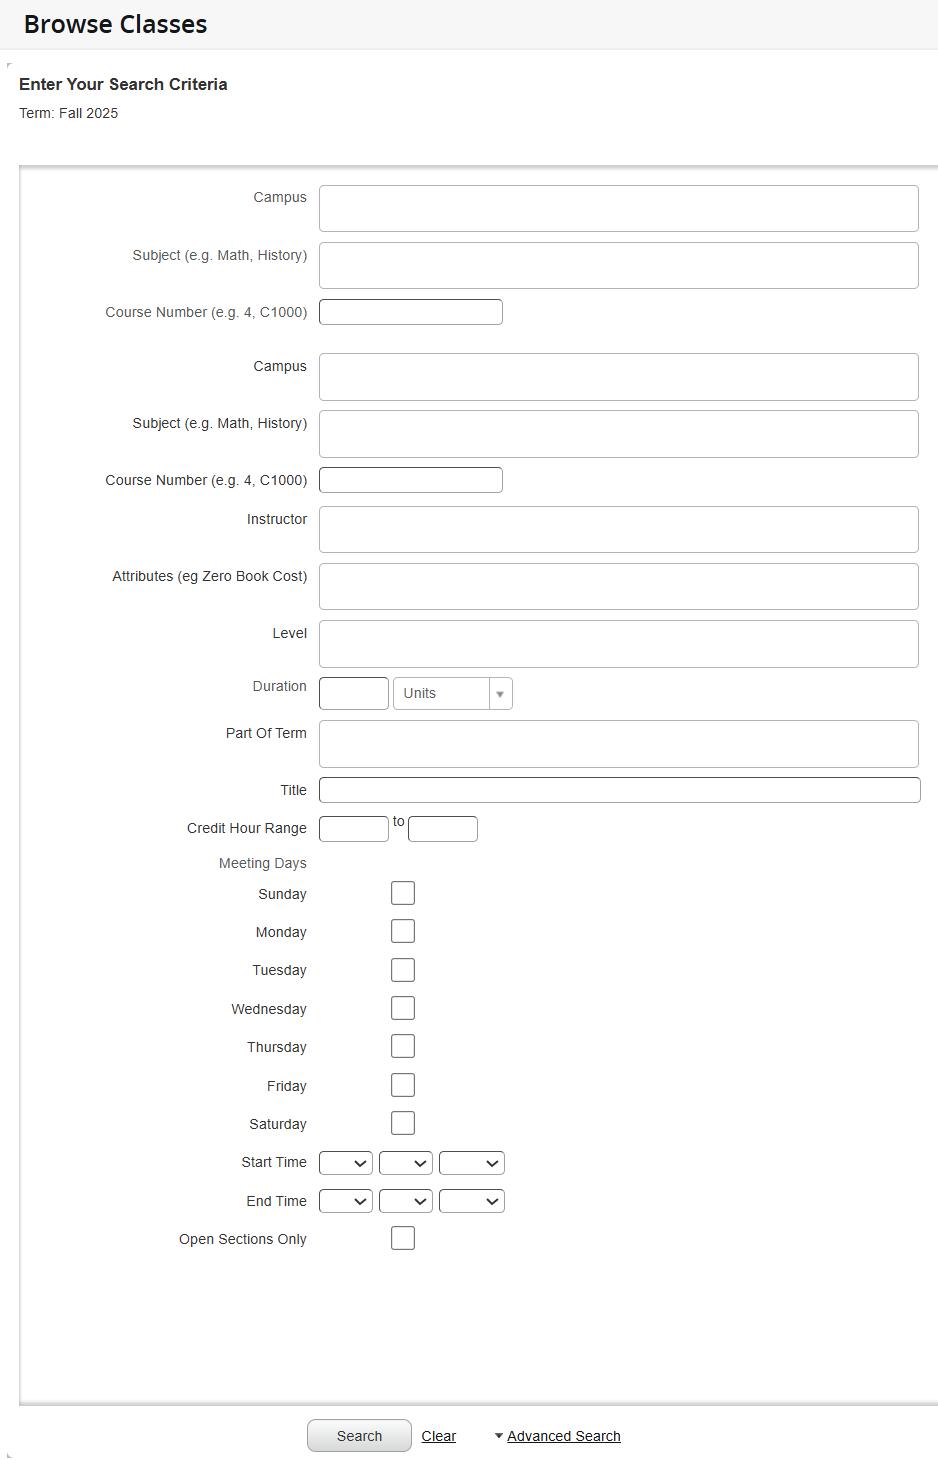
- The Find Classes tab displays basic search criteria of Campus, Subject, and Course
Number. If you need more search criteria, click the Advanced Search link.
Basic Search View
Advanced Search View
- Enter your search criteria and click the Search button.
- The Search Results will produce a list of all active classes for the term.
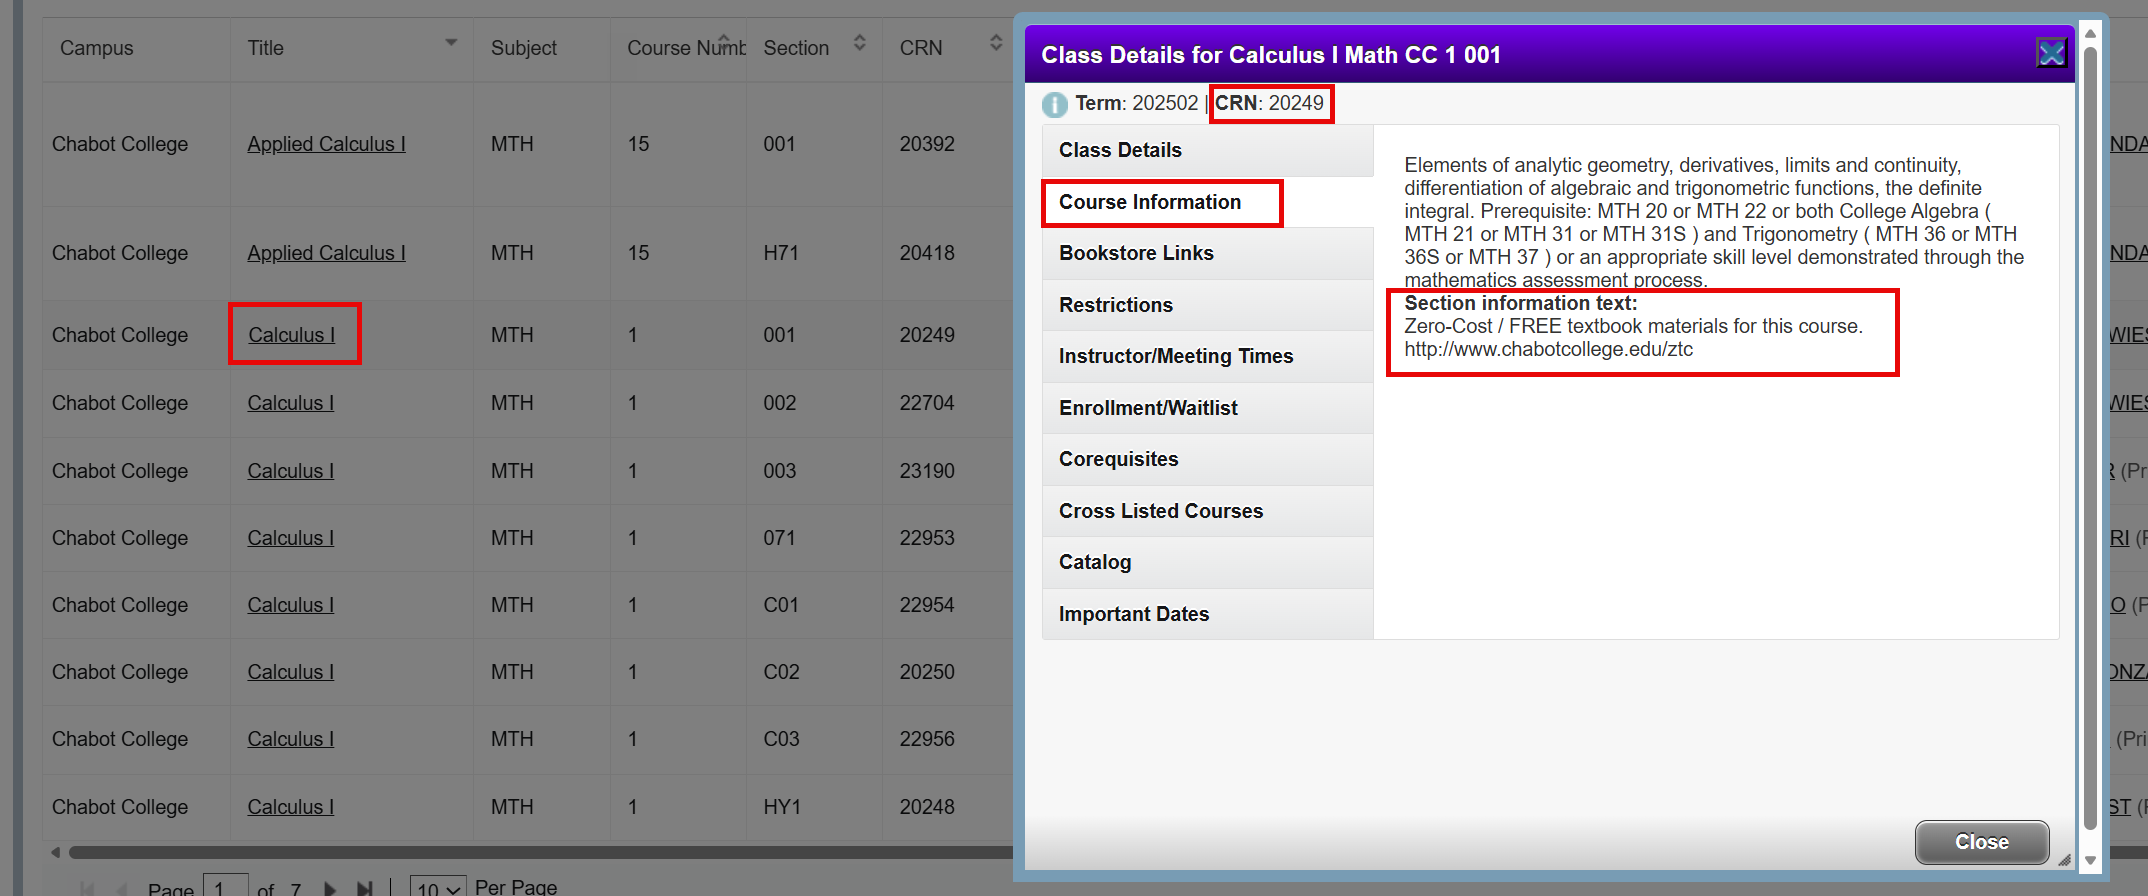
- The class list will display in ascending order by Subject Description, Course Number, and Section. To change the order, use the arrows next to the title in the column heading.
- Check the Campus column to see which college is offering the course.
- Use the gear in the right corner to hide columns.

- Click the course title to view class details, course information, bookstore links,
prerequisites, corequisites, and other information.
- Click the Search Again button to perform a new search.

Use the Browse Classes by Course to view basic course information such as number of units, course descriptions, prerequisites, and restrictions.
- Click on Browse Classes by Course.

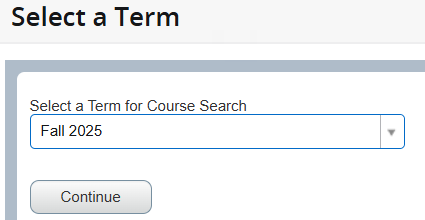
- Select a term and click Continue.
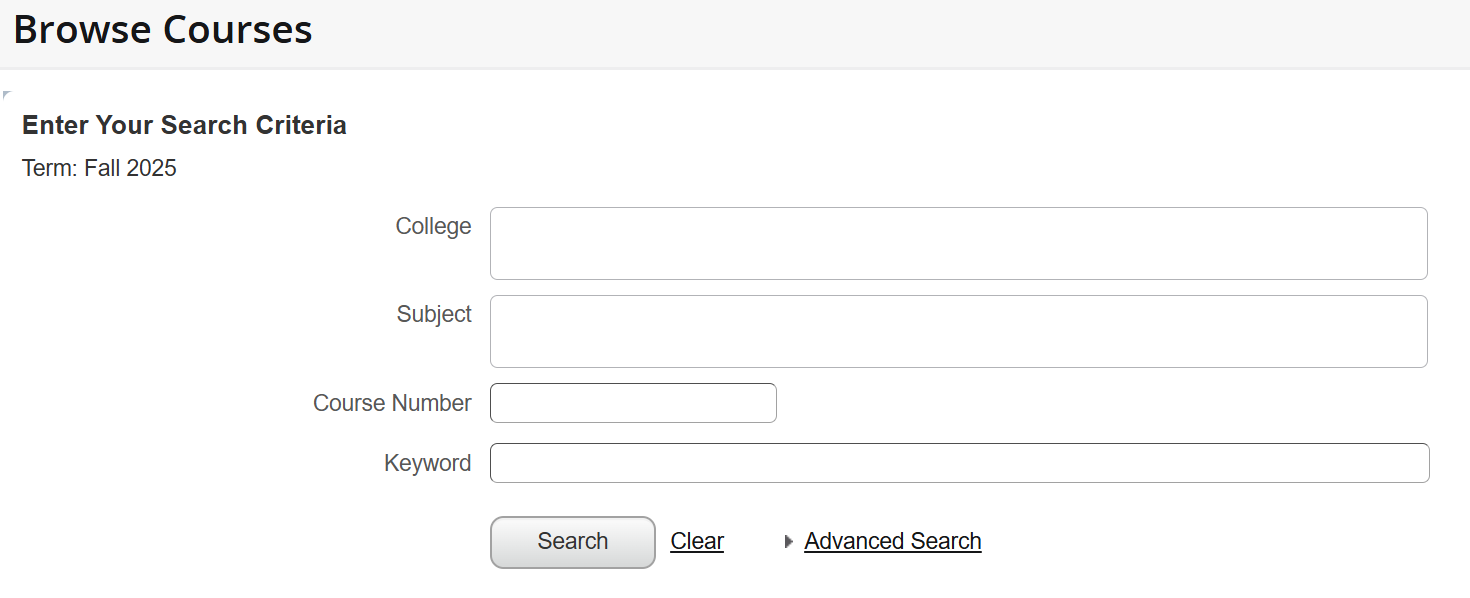
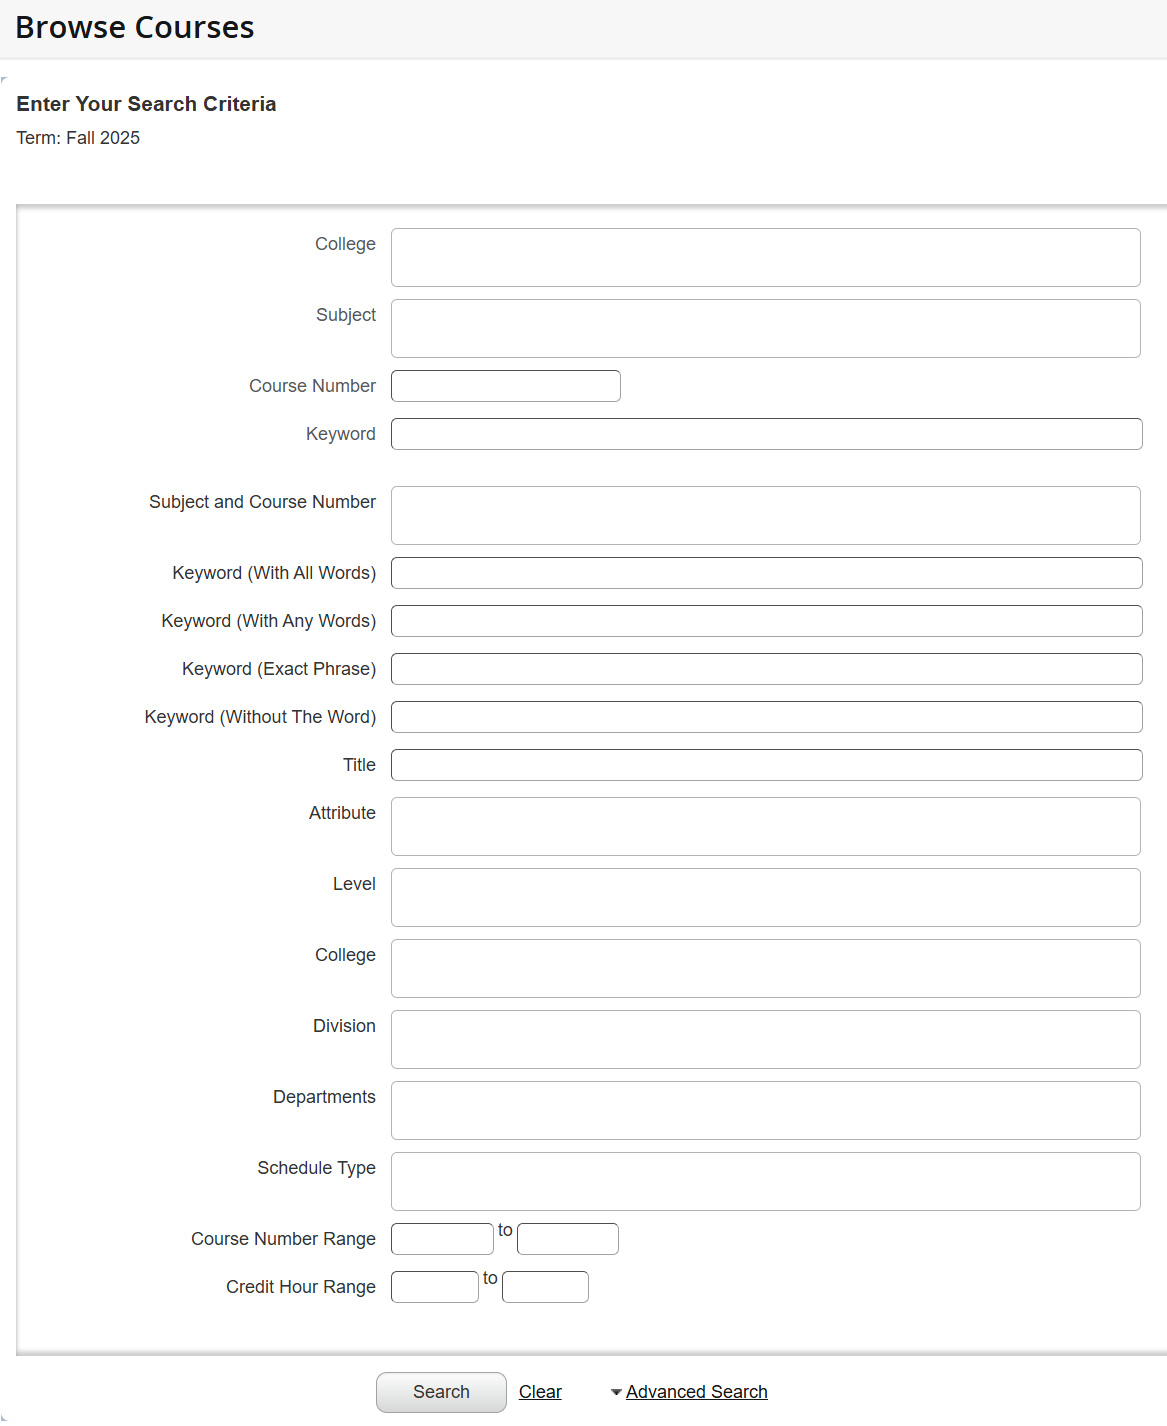
- On the next screen, you can enter the basic search criteria of Campus, Subject, Course
Number, and Keyword. If you need more search criteria, click the Advanced Search link.
Basic Search View
Advanced Search View
- Enter your search criteria and click the Search button.
- The Search Results will produce a list of all active courses at the catalog level
for the term.
- The course list will be displayed in ascending order by Subject and Course Number. To change the sort order, use the up and down arrows next to the title in the column heading.
- Use the gear in the right corner of the Search Results view to hide columns.
- Click the course title to view class details, bookstore links, course description, prerequisites, corequisites, and other information.
- Click the View Sections button to see if course sections are offered for the selected
term.

- Click the Search Again button to perform a new search.

HOW-TO
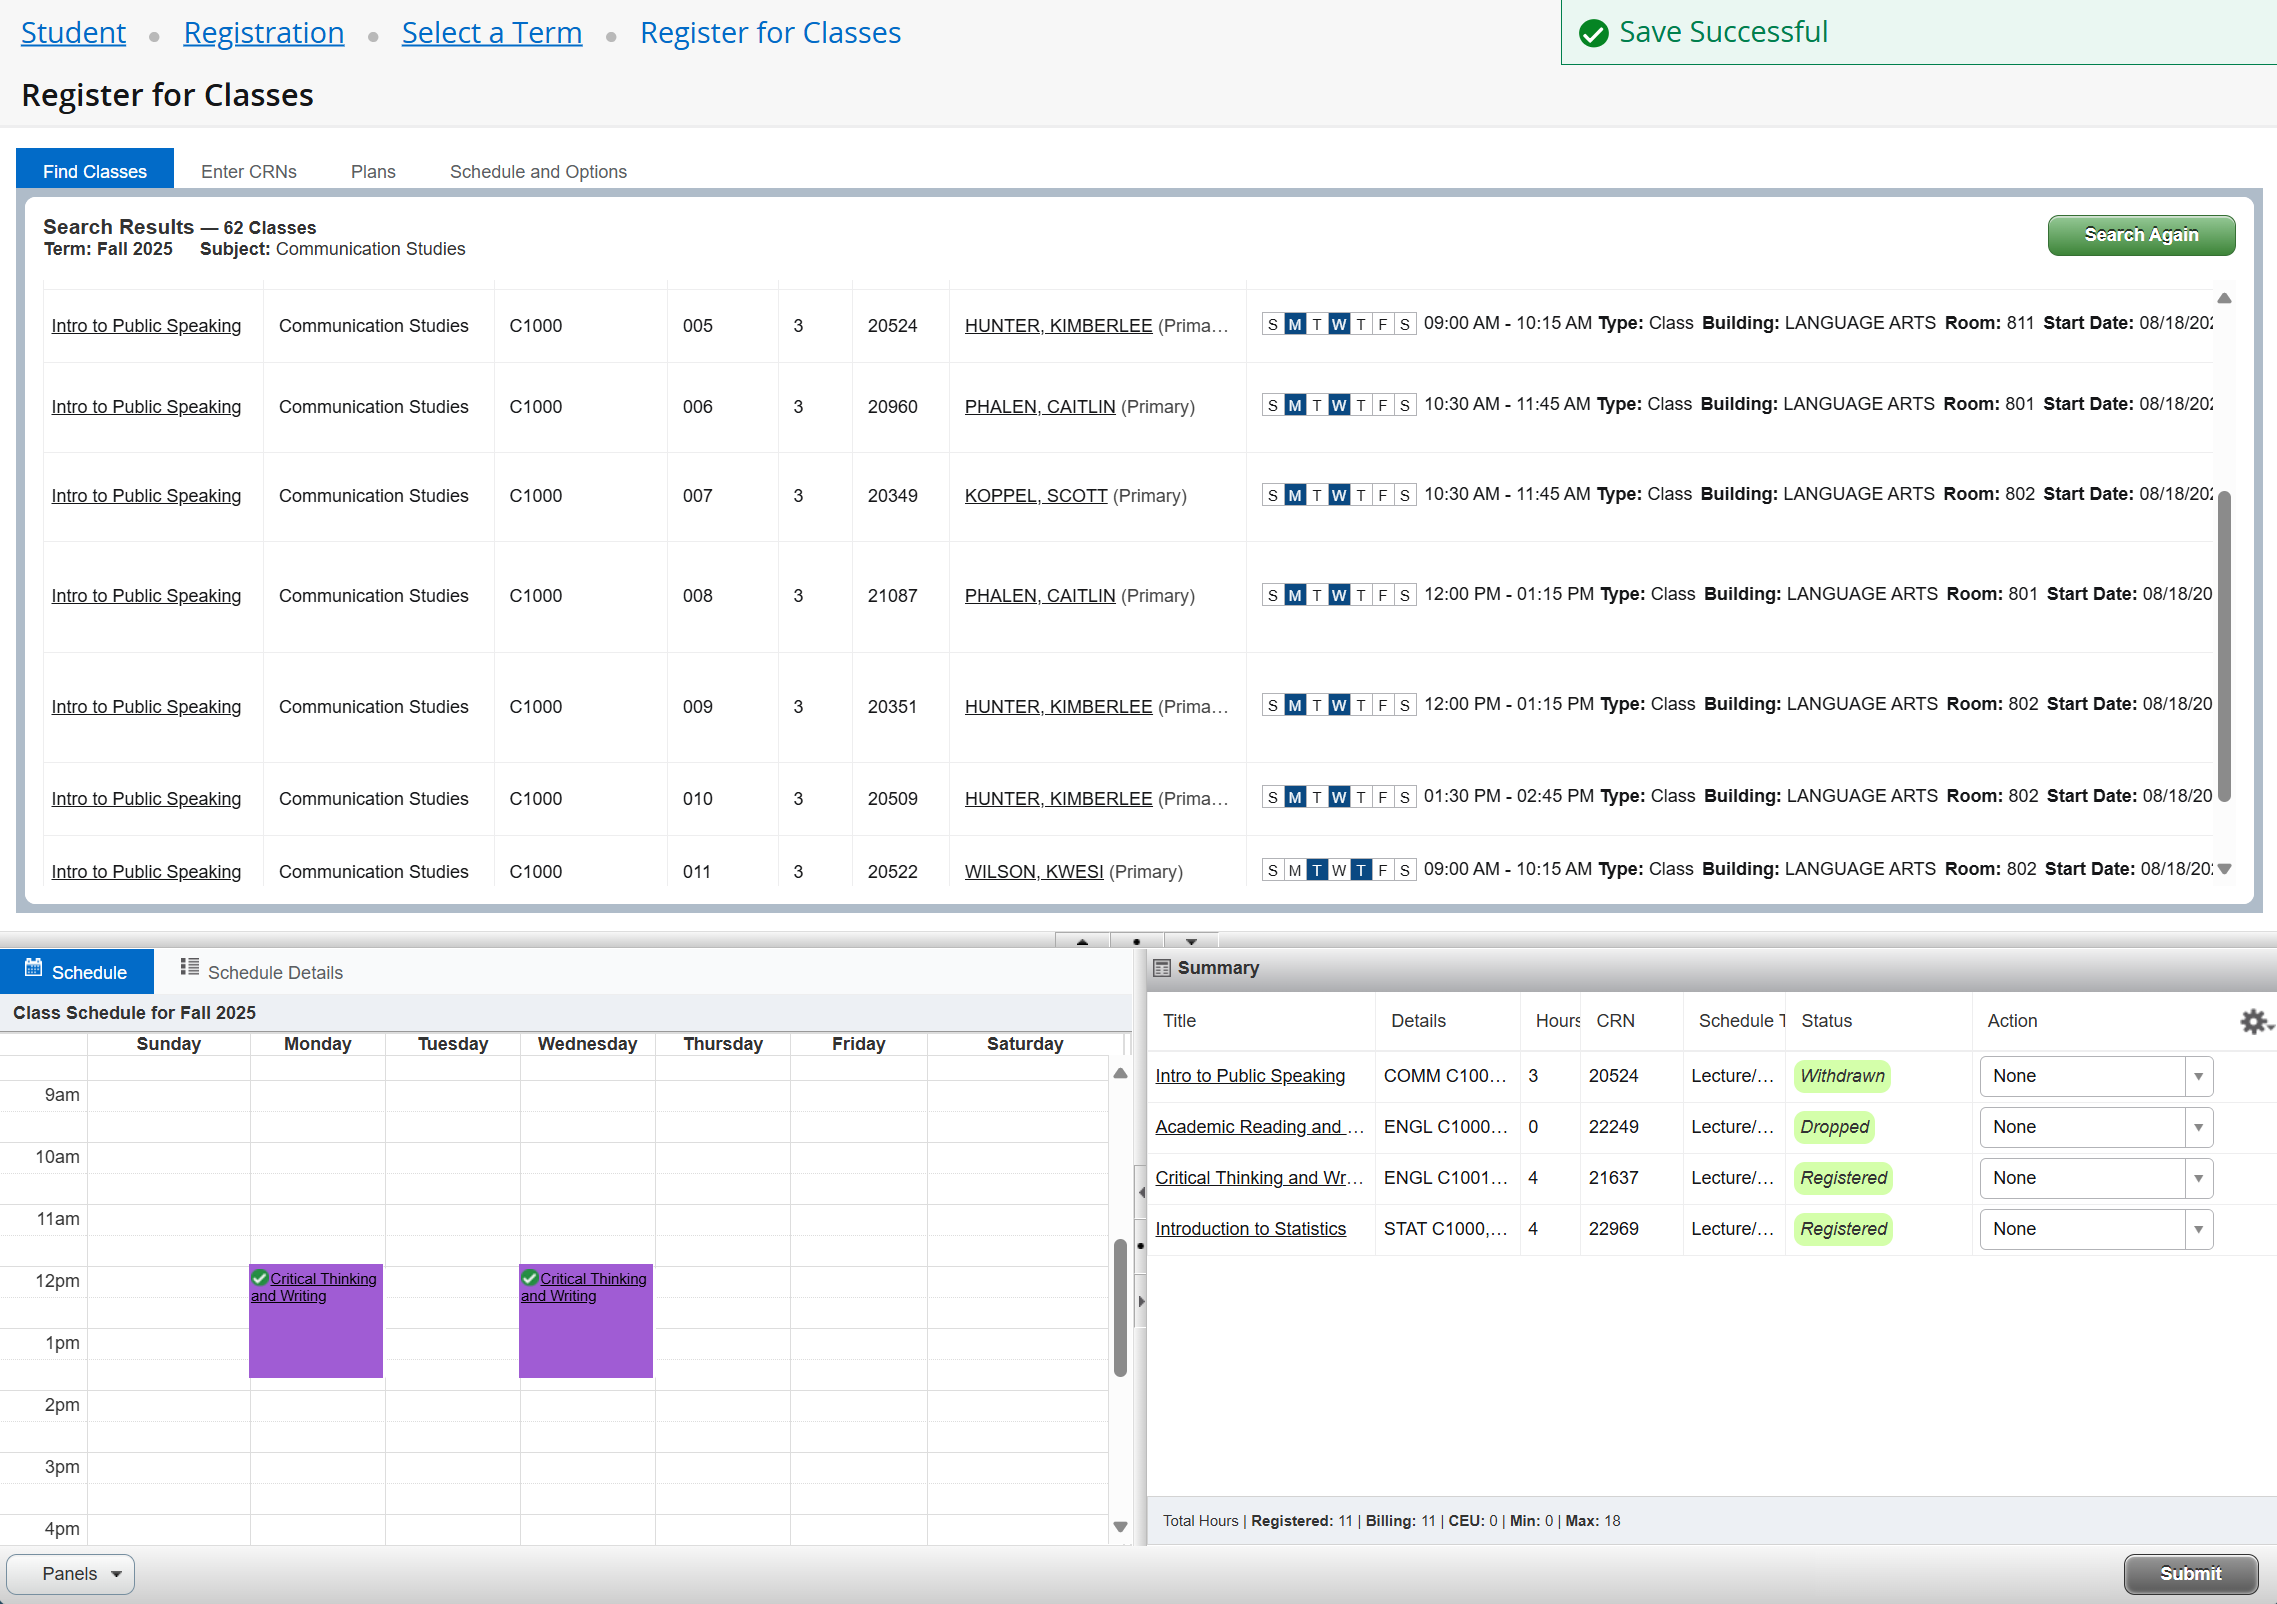
Use the Register for Classes link to add, drop, or withdraw from classes.
IMPORTANT NOTE: The following examples DO NOT reflect the actual course section offerings for the term listed.
- Click on Register for Classes.

- Select a term and click Continue

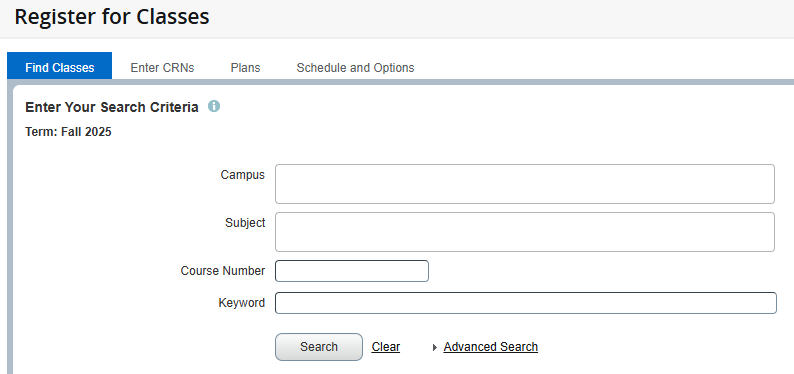
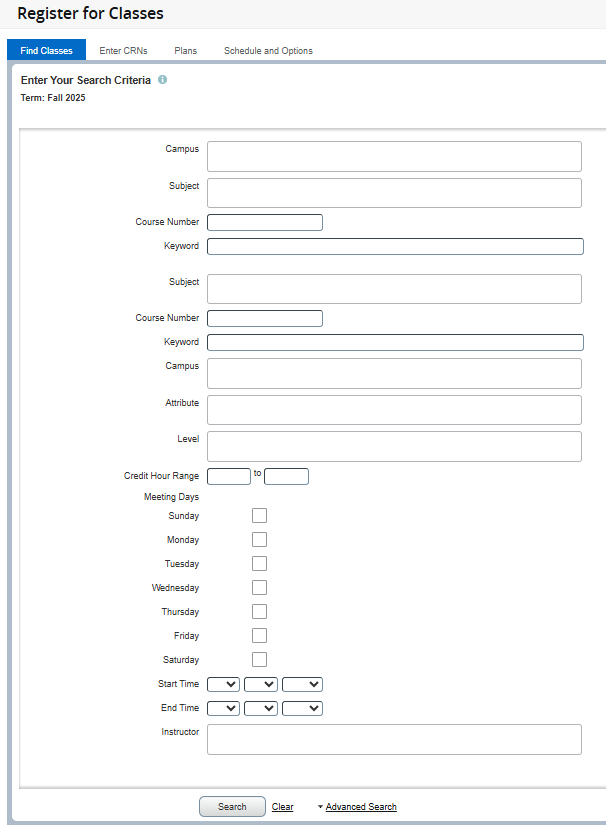
- The Find Classes tab displays basic search criteria of Campus, Subject, and Course
Number. If you need more search criteria, click the Advanced Search link.
Basic Search View
Advanced Search View
- Enter your search criteria and click the Search button.
- The search results will list classes in ascending order by Subject, Course Number,
and Section.
- To change the sort order, use the arrows next to the title in the column heading.
- To see class details, click the course title in the Title column.
- To see which college is offering the course, see the Campus column.
Click image to enlarge

- Use the gear in the right corner of the Search Results to hide columns.
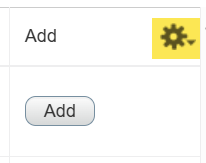
- Add a course section to the schedule by clicking the Add button.

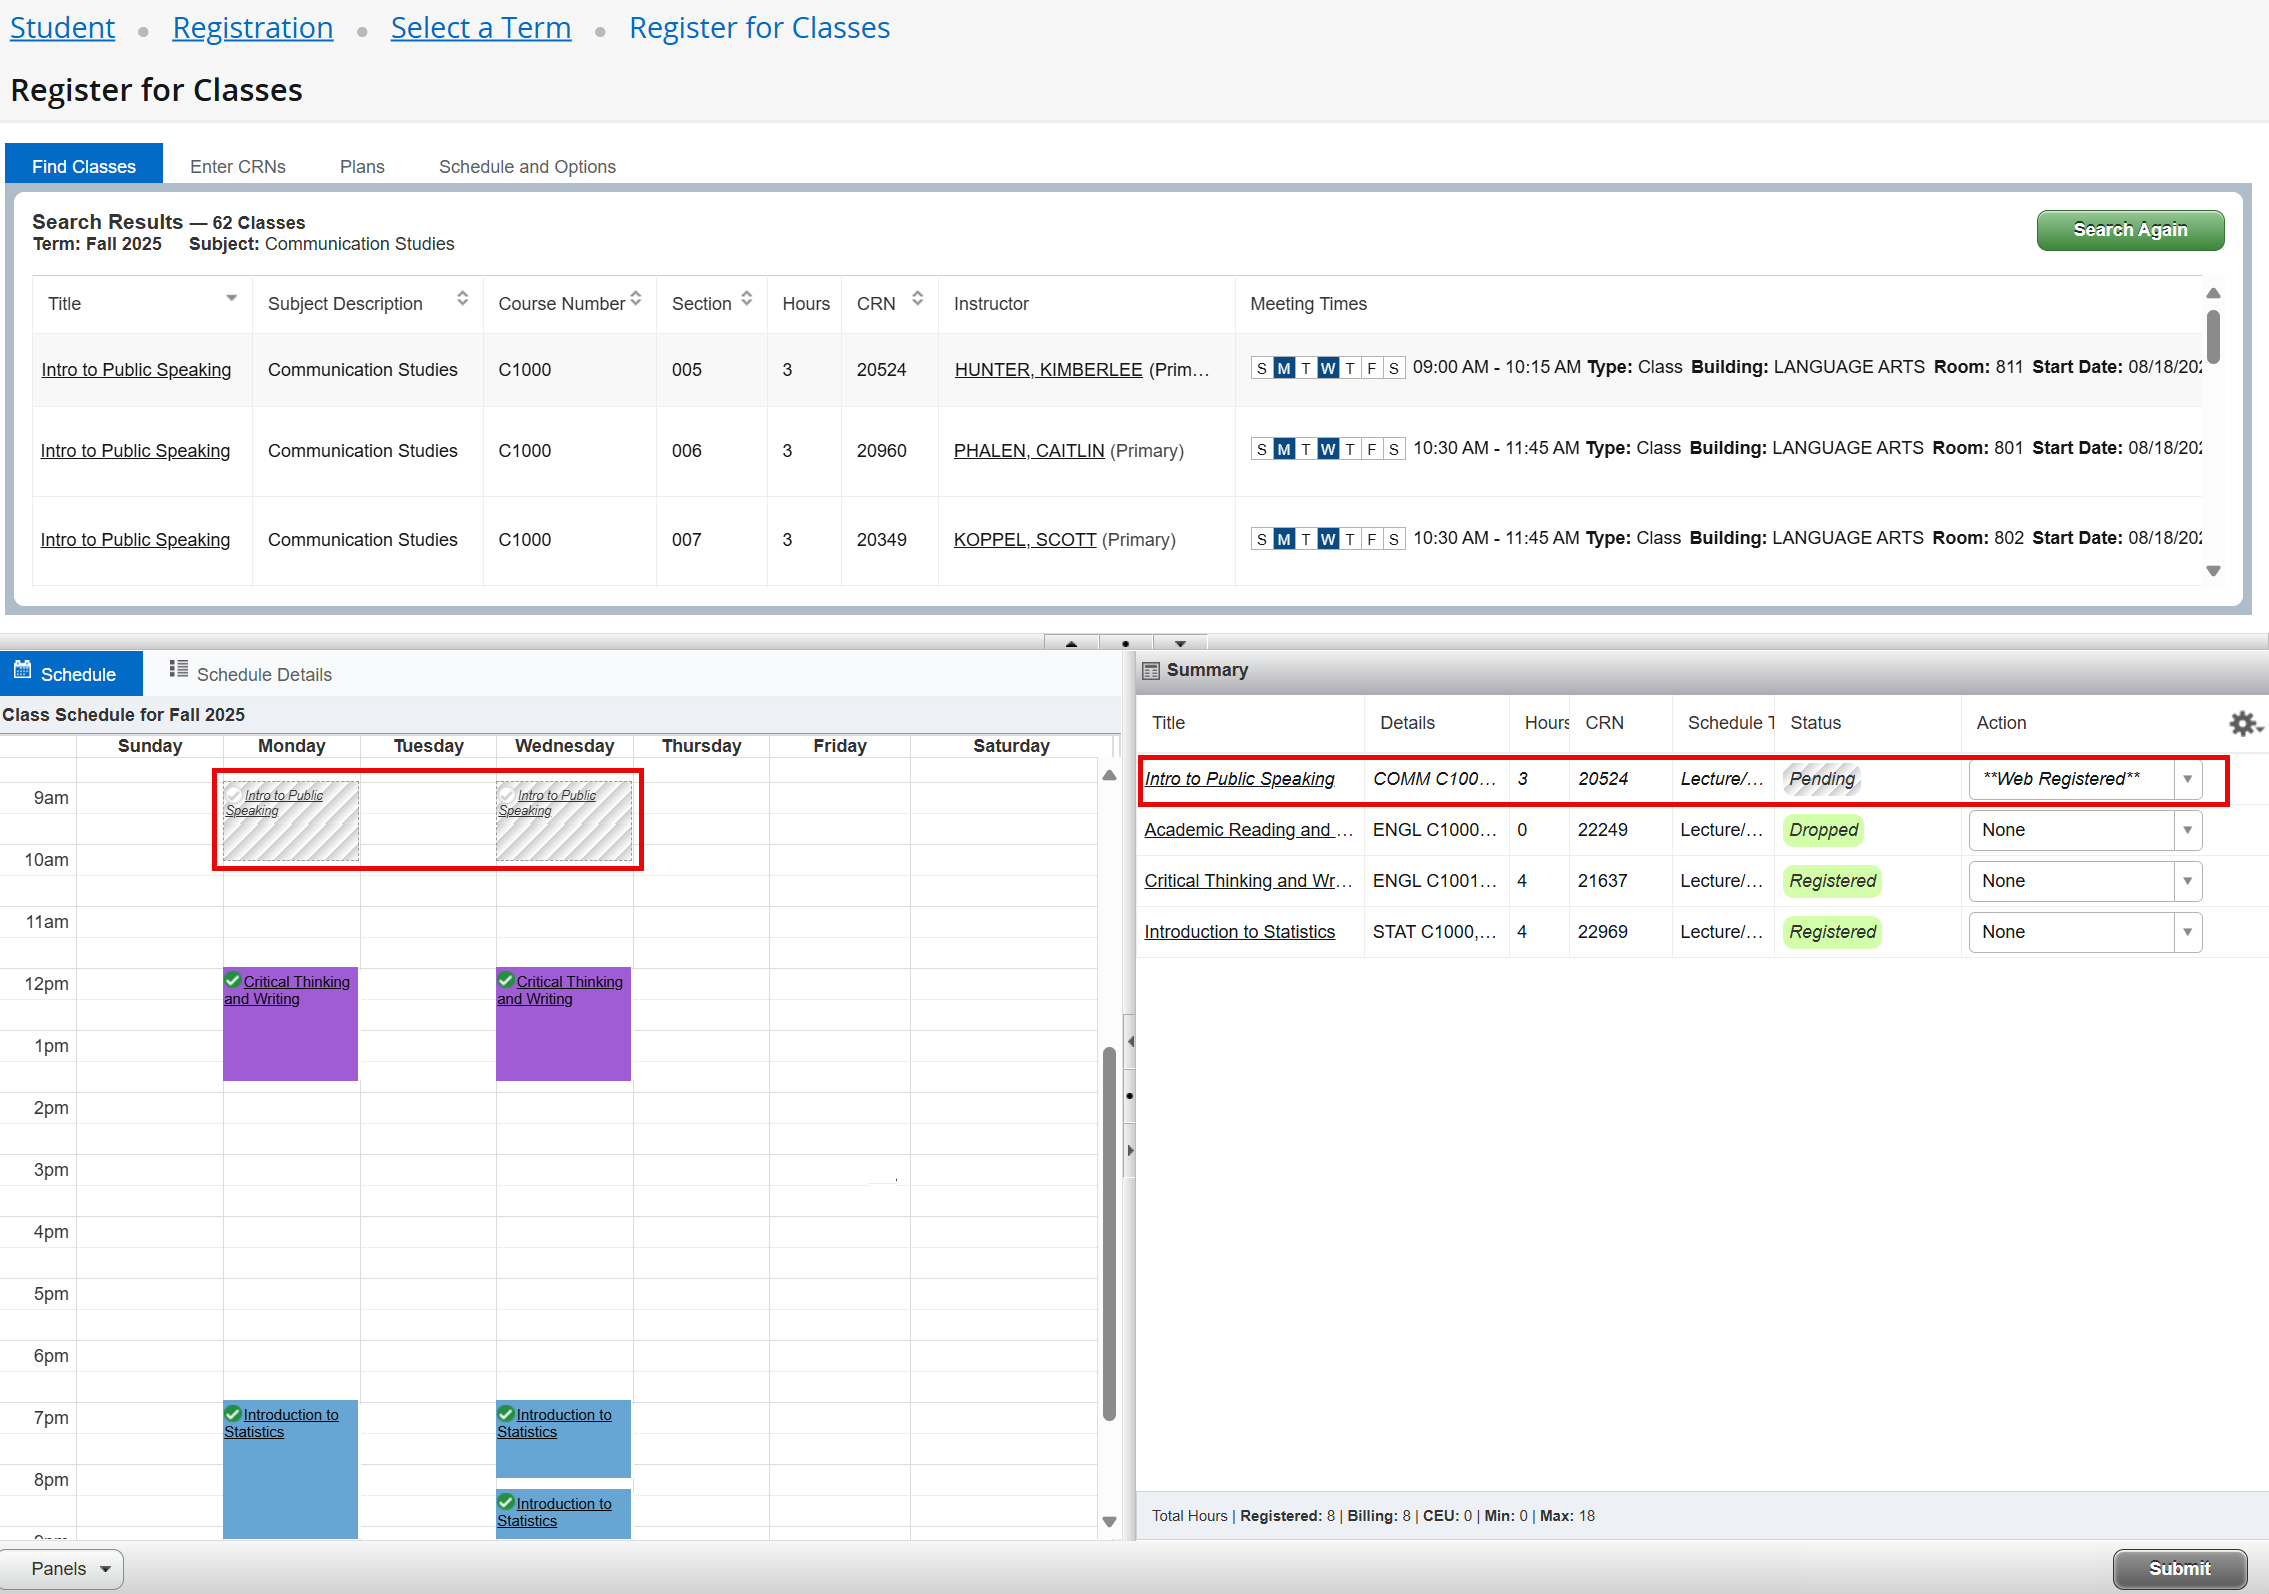
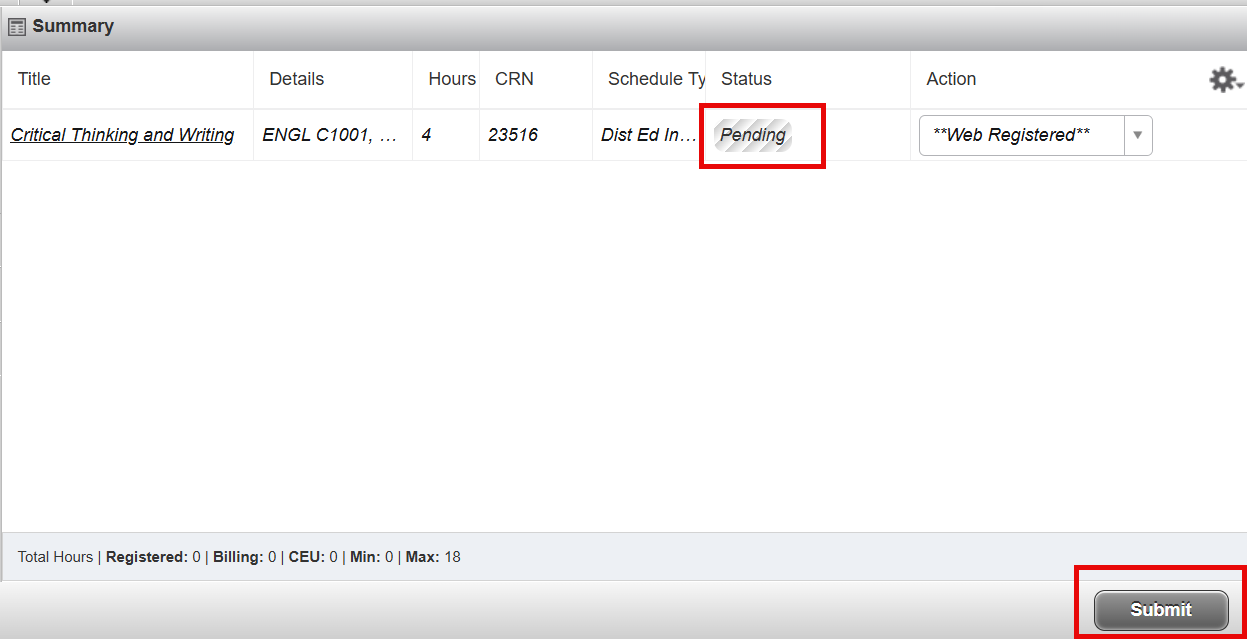
- The course section will be listed below the search results, in the Schedule and Summary panels with a Pending status.
- When finished, click the Submit button in the lower right corner.
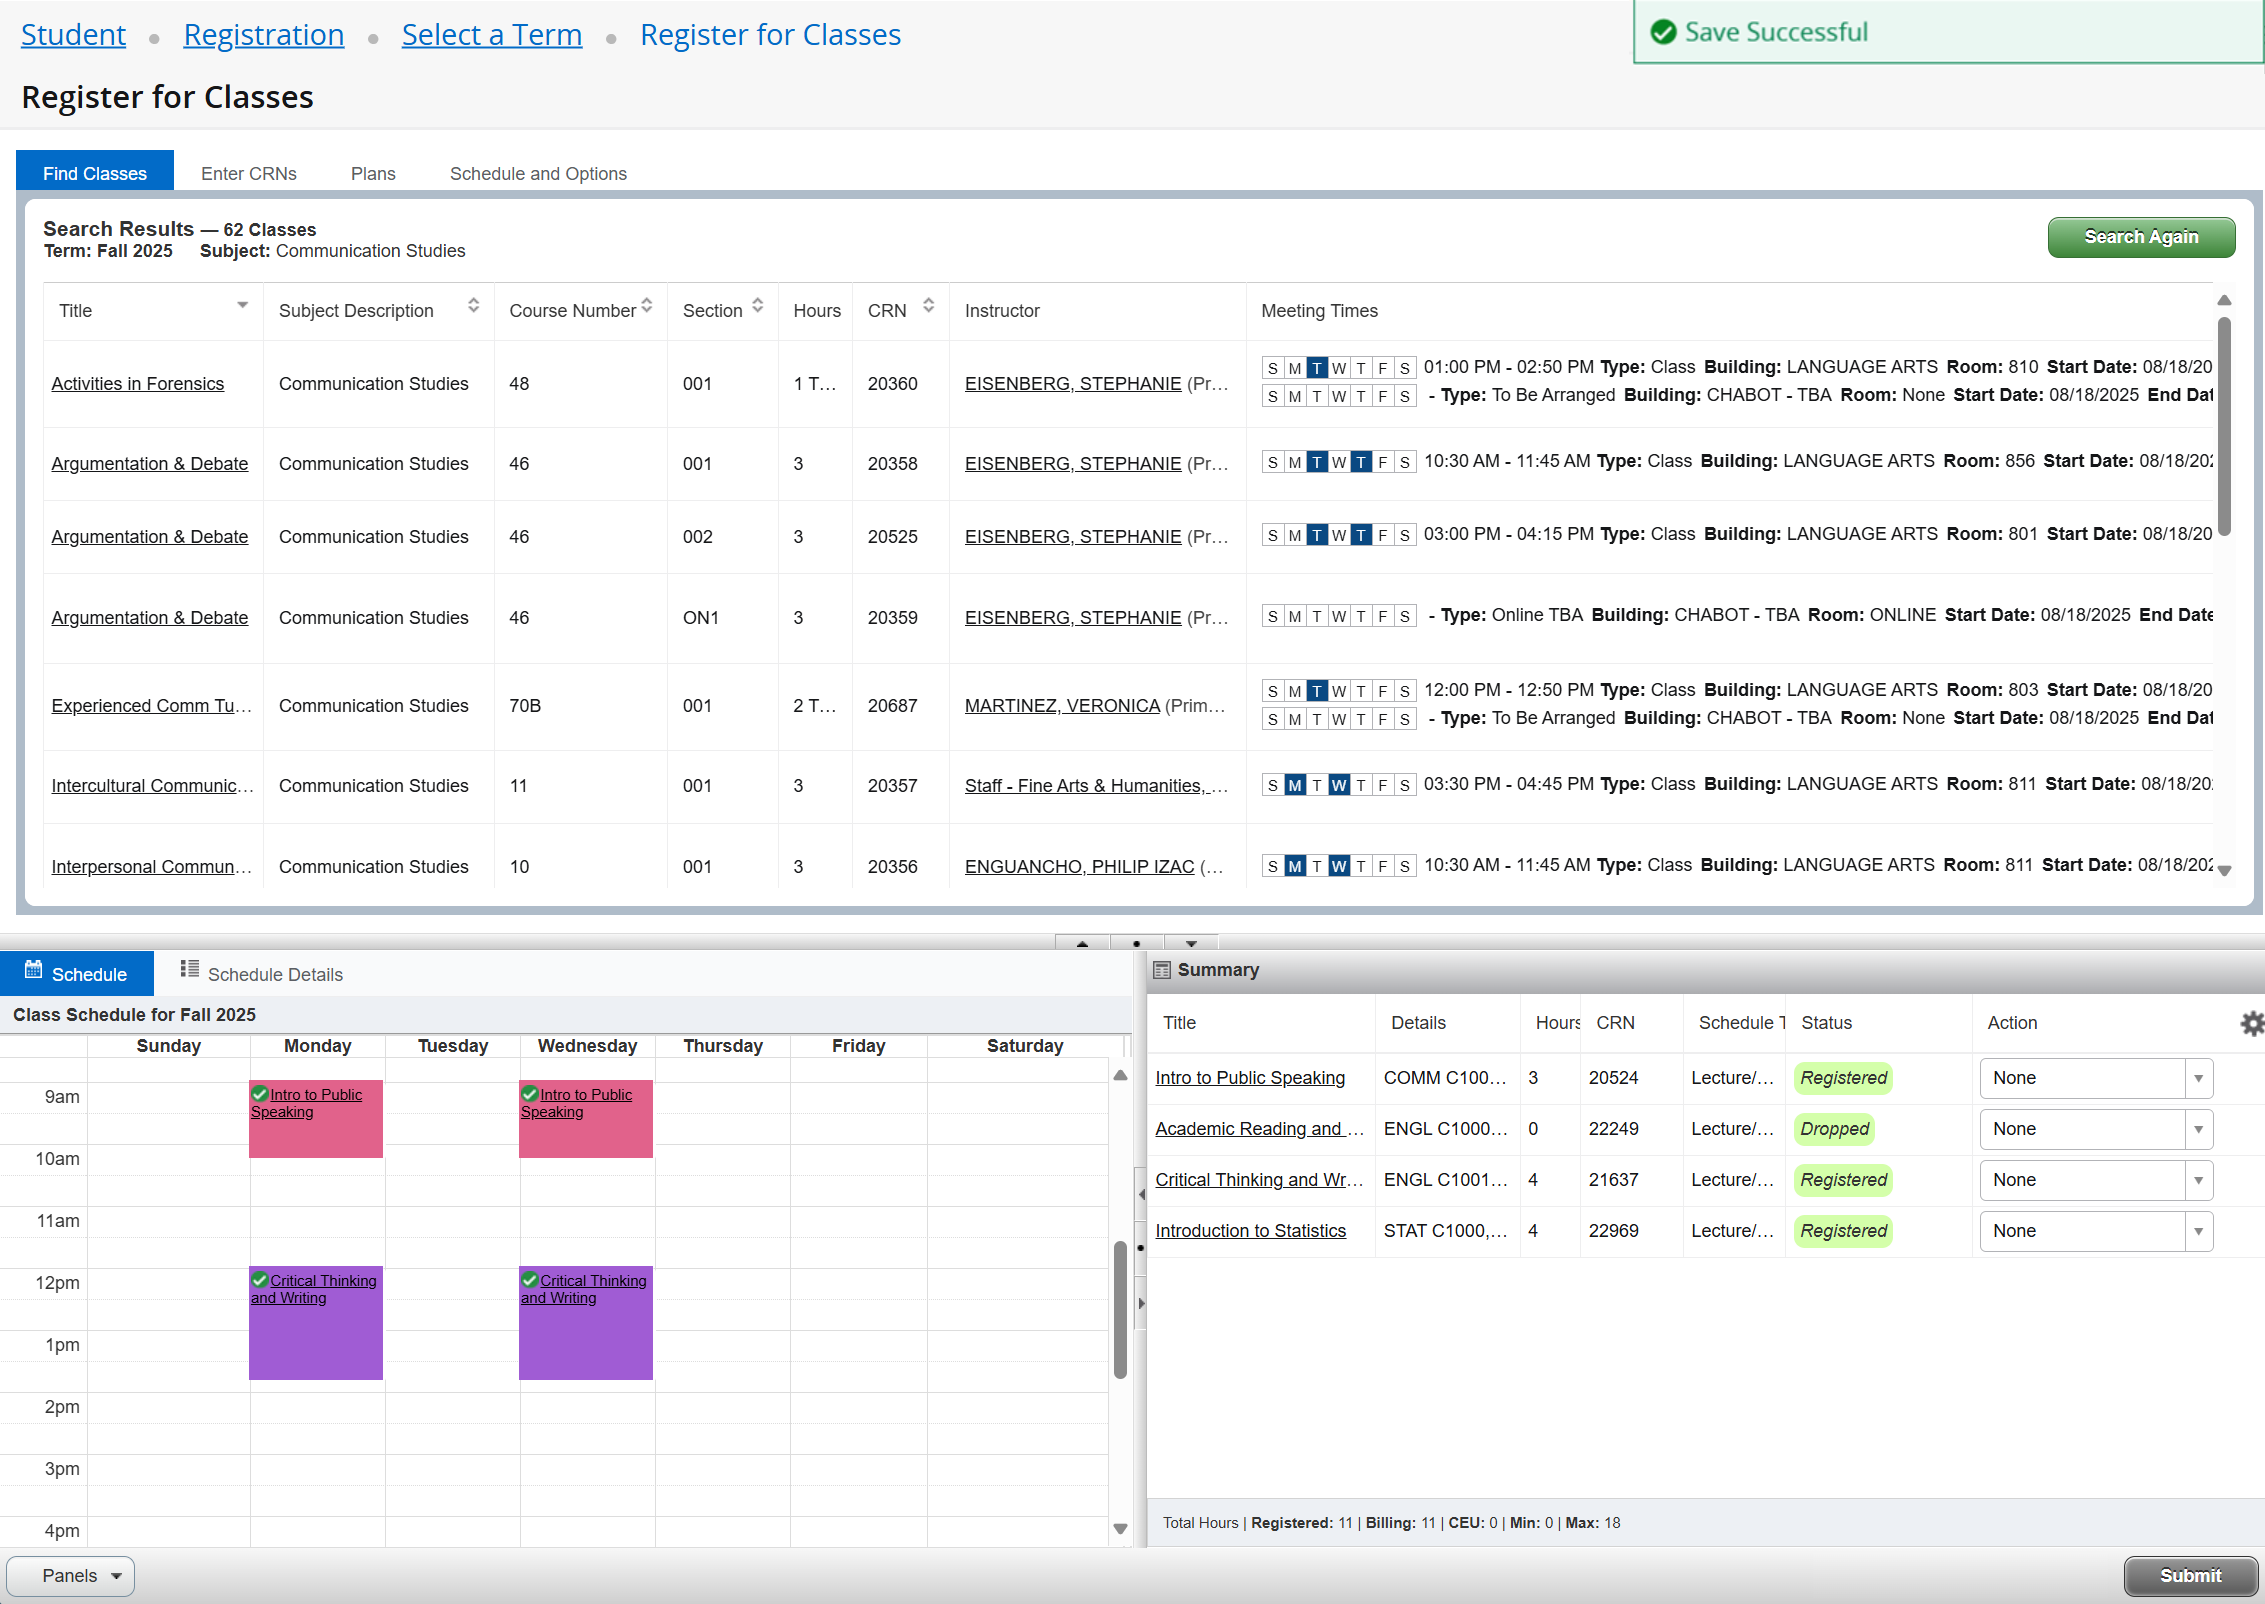
- A registration message will appear in the upper right corner indicating the registration
was successful or unsuccessful due to registration errors.
Students can register for classes with a Course Reference Number (CRN).
A CRN is a five-digit number that identifies a specific section of a course.
- Click on Register for Classes.

- Select a term and click Continue

- Click on the Enter CRNs tab
- Enter the CRN and click the Add to Summary button.
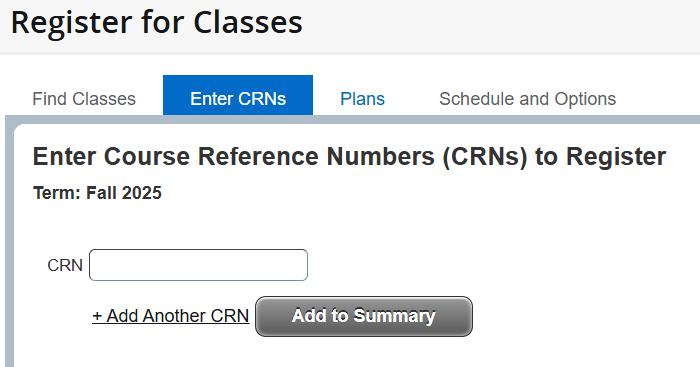
- In the Summary panel, the status will show Pending until you click the Submit button
to add the course section.
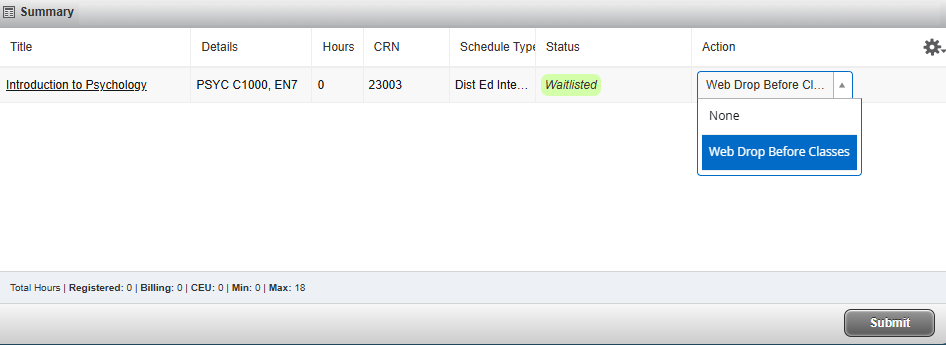
Students may reserve a space on the waitlist for courses that are closed due to reaching their maximum enrollment limit.
Waitlist Notifications: All notifications for the waitlist will be e-mailed to the student’s Zonemail account. If a seat becomes available for a course, the student at the top of the waitlist receives a notification e-mail to register for that class within 72 hours. If the student does not take action before the stated expiration date and time, the student loses their spot to the next student on the waitlist.
- On the Registration Landing Page, click on Register for Classes.

- Select a term and click Continue

- Perform a class search by entering your search criteria and clicking the Search button.
If you need more criteria, click the Advanced Search link.

- Classes that have a waitlist will have waitlist information in the Enrollment/Waitlist
column. If the class is full, students may join the waitlist.

- To join the waitlist, click the Add button.

- The class appears below in the Summary panel with a status of Pending.
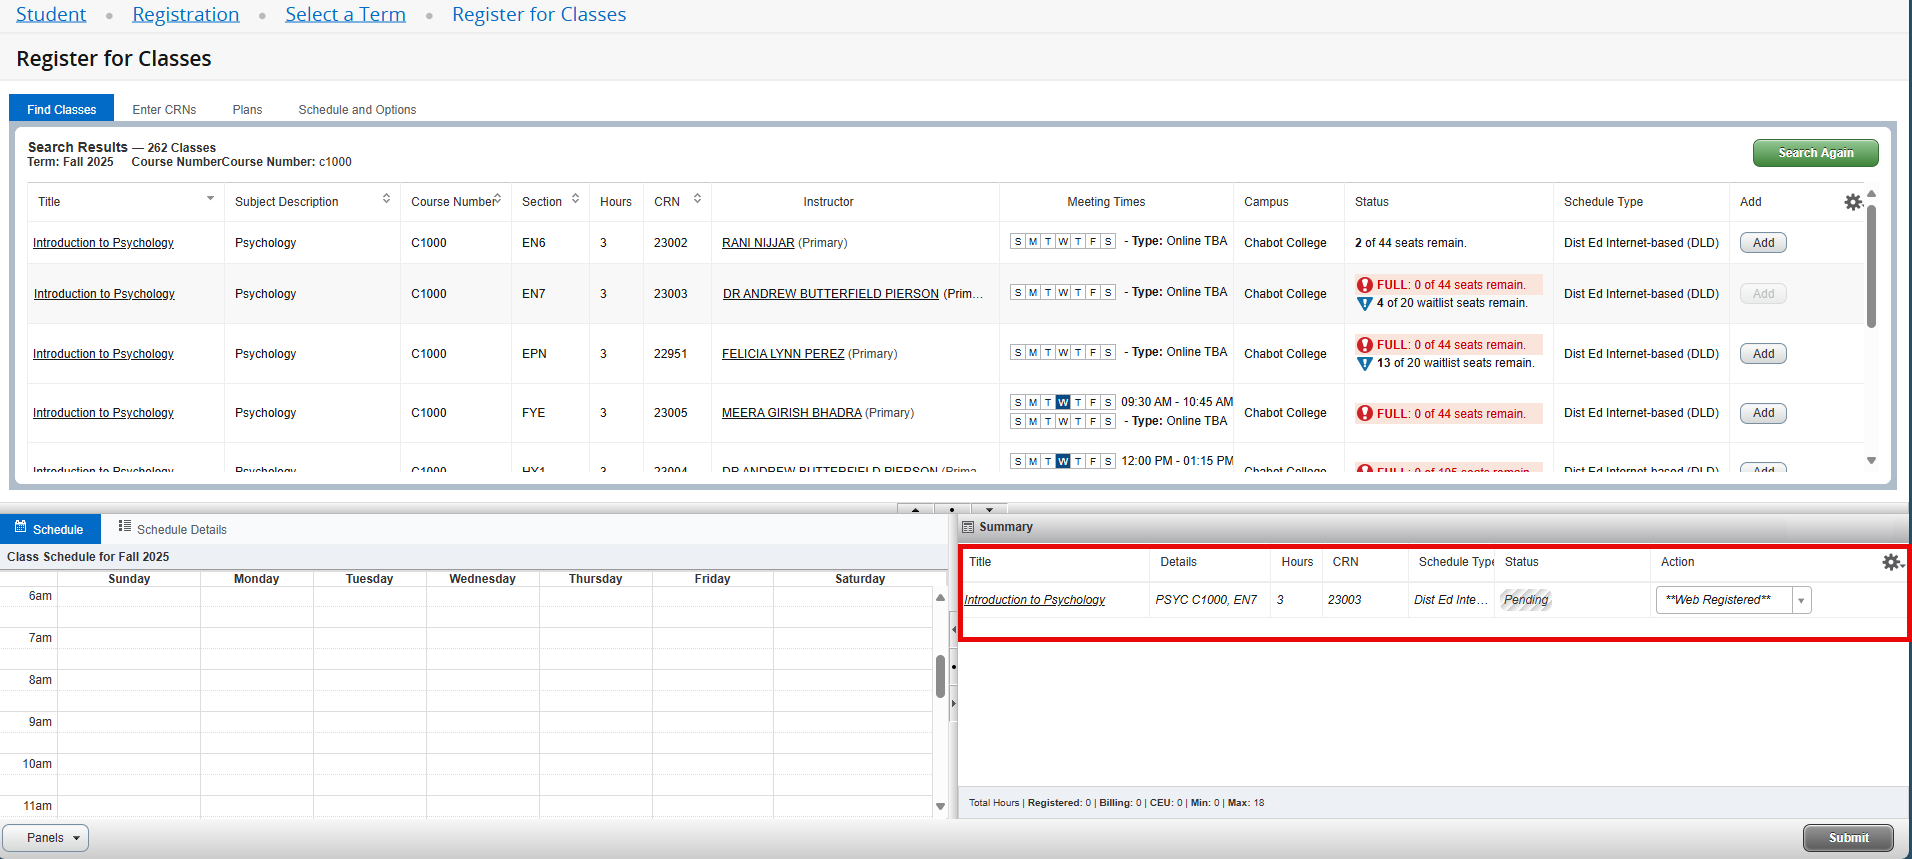
Note: If you do not change the Action to Waitlist and attempt to add the class, you will receive the following error message:
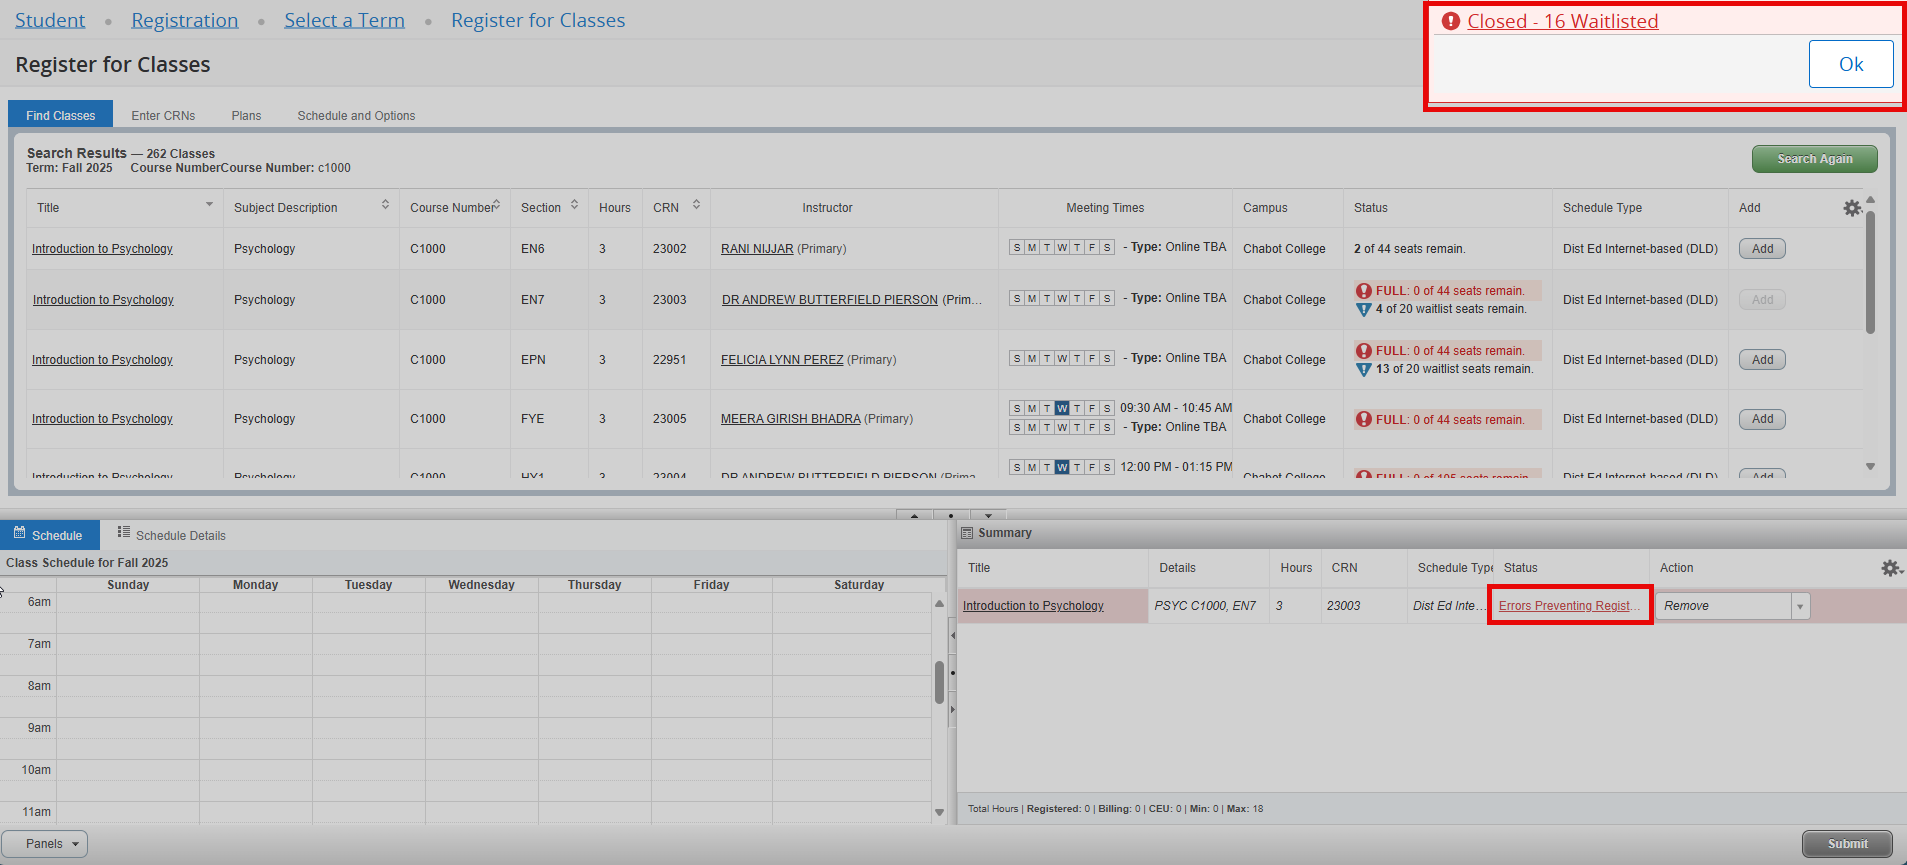
- Click the Action drop-down and select Waitlist. Click the Submit button.

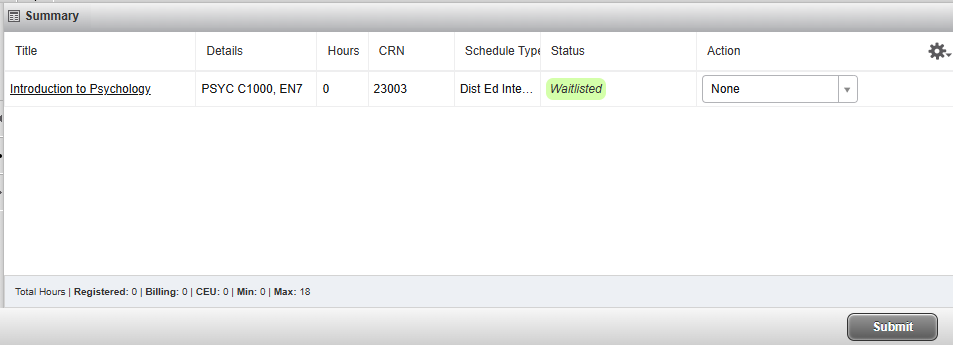
- The transaction is processed successfully. The class appears in the Summary panel
with a status of Waitlisted.
Note: To view your Waitlist Position, click on the Schedule Details tab, then click the caret to the left of the course title to expand the details:

- To leave the waitlist, select the Drop option in the Action drop-down and click the
Submit button.
- The transaction is processed successfully. The status of the class is changed to Deleted.
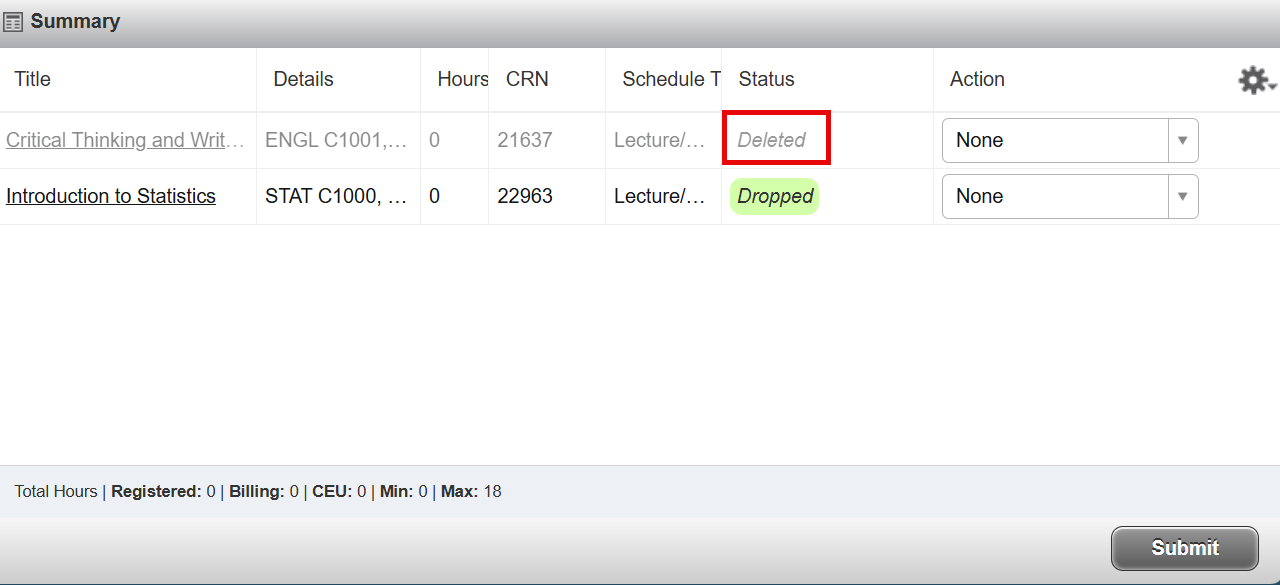
- Click the Submit button again to remove the class from the Summary panel.
Use the Register for Classes link to change a grade mode to Pass/No Pass, instead of a standard letter grade.
This option is not available for all courses. Please review the class schedule to see if the course is eligible.
- Click on Register for Classes.

- Select a term and click Continue

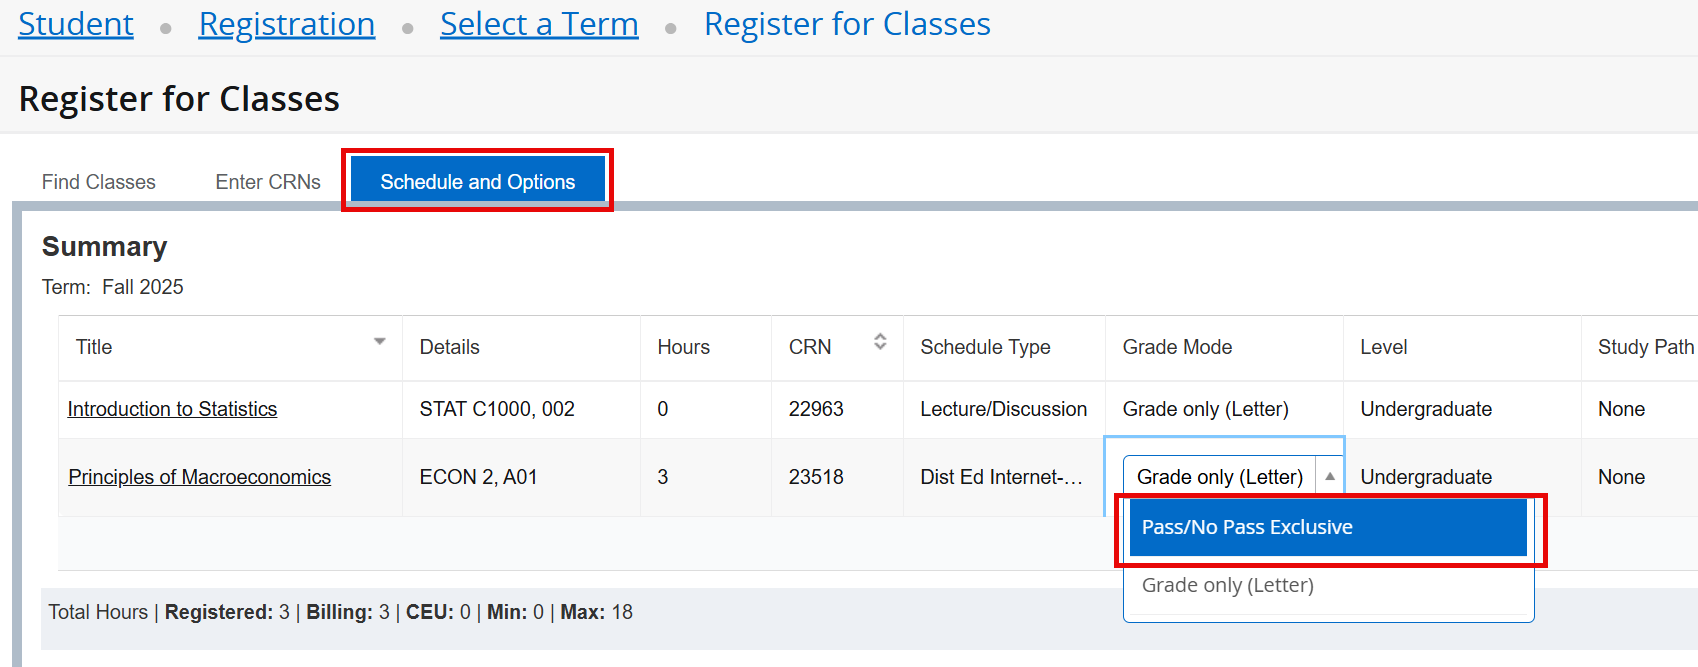
- Go to the Schedule and Options tab and click on the drop down menu in the Grade Mode
column to choose Pass/No Pass Exclusive.
- Once you've chosen Pass/No Pass, click the Submit button in the lower right corner
to save your changes.
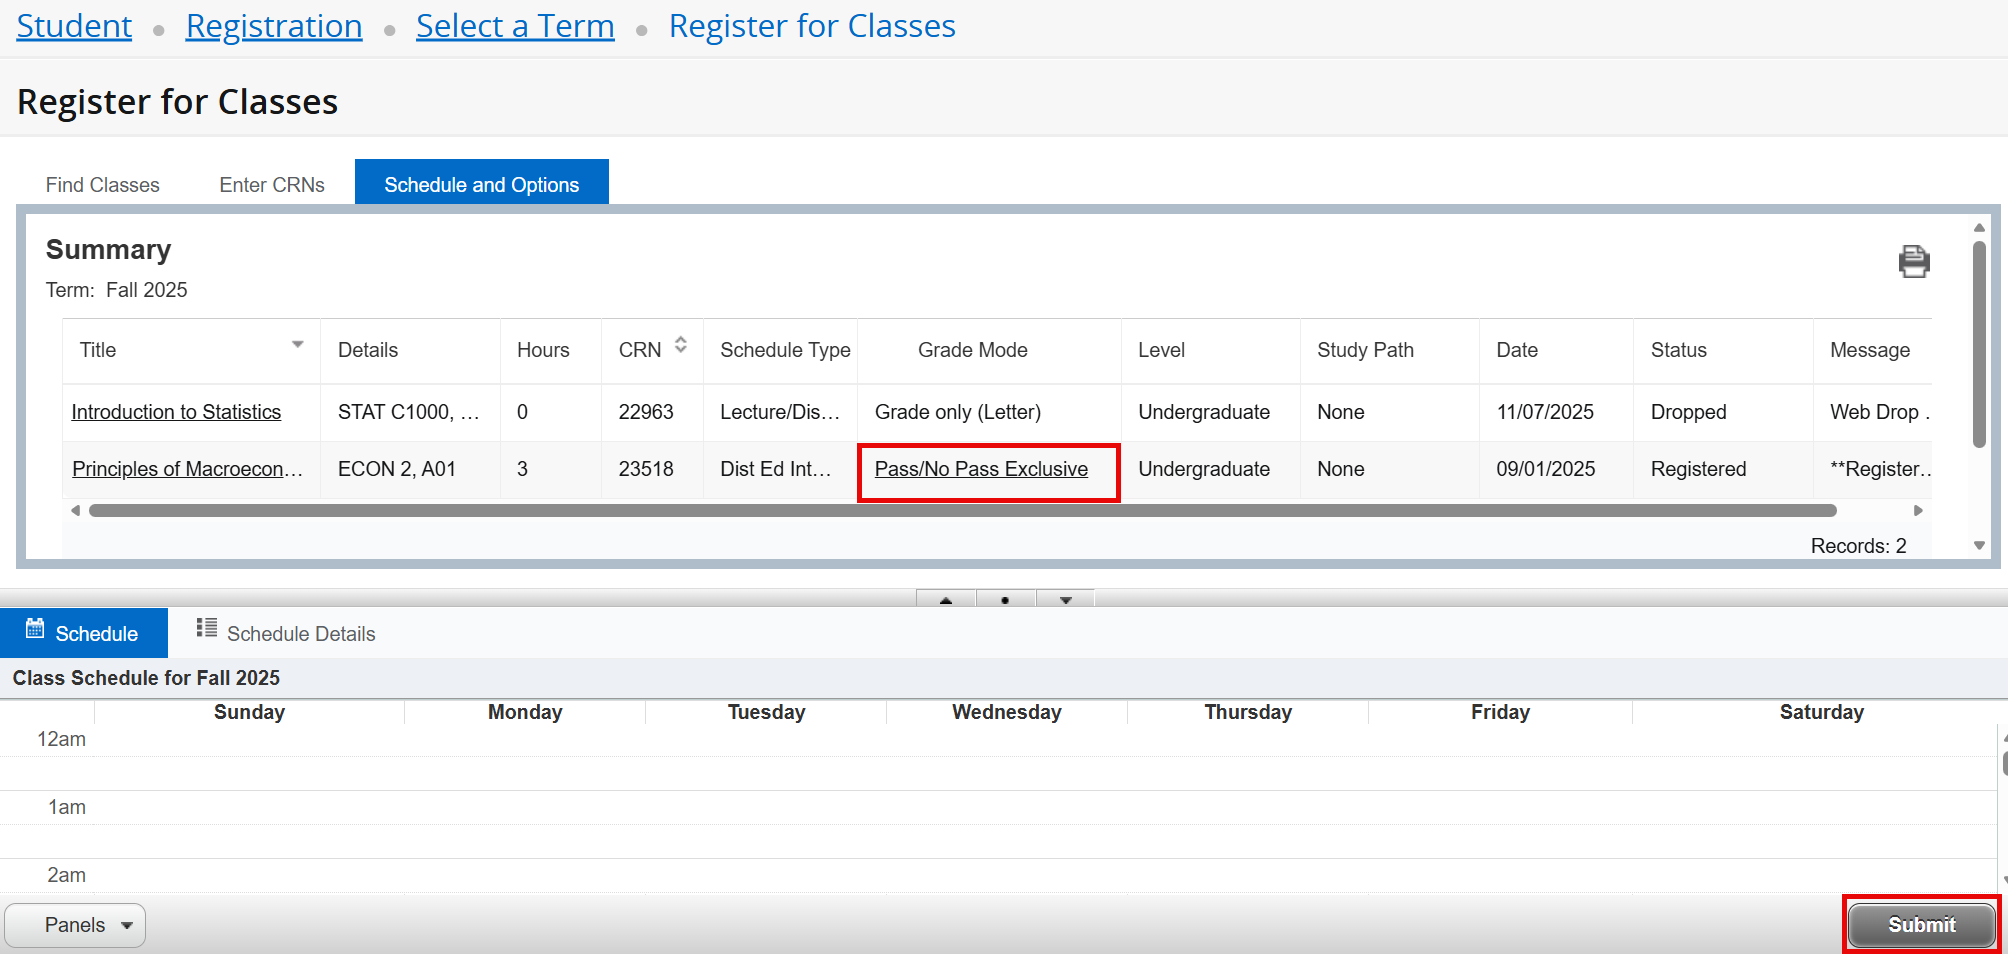
- When the transaction is processed successfully, you'll see the Save Successful notification
in the upper right corner and now the Grade Mode column has been updated.

Click the Course Title to view Class Details, Deadlines, and Course Information


Use the Register for Classes link to Drop a Class.
- Click on Register for Classes.

- Select a term and click Continue

- To drop a course section, go to the Summary panel in the lower right corner to click
the Action drop-down list and choose the Drop option available.

- Click the Submit button.
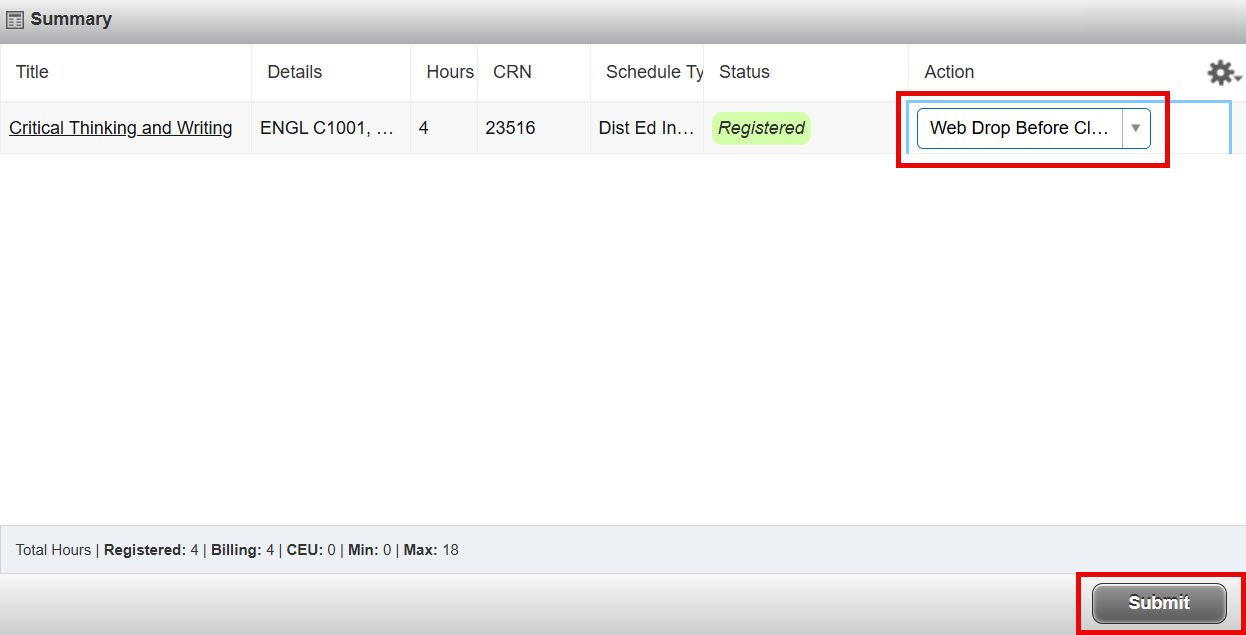
- The course section is now dropped. Click the Submit button again to remove the dropped
section from the Summary panel.
